LAYING NEW WOOD FLOORING OVER ORIGINAL, UNEVEN FLOORBOARDS
[AD - Flooring was provided by Quickstep Floors as part of an ongoing collaboration]
One of the reasons we liked this house when we first saw it was the original floorboards throughout, having never had them in a house before.
But it was more of a romanticised idea of having original floorboards than enjoying them in reality. They weren’t the best of quality in the first place and had a dark stain on that would have been a real challenge to sand off thanks to so many nails sitting slightly proud of boards. Also, they were super draughty - I read somewhere once that all the gaps between the boards of an average size floor is the equivalent to an open window.
So anyway, once we’d convinced ourselves it was okay to update the flooring, we started working with Quickstep Floors on our living room project. We knew we wanted something light to brighten up the space, but with a bit of character to add some texture to the space. We ordered a load of samples, but in the end, we were most taken with the Dynamic Raw Oak Extra Matt. It’s a real engineered wood floor in a parquet style, and we loved the raw finish that stopped it feeling too flat. Plus, we knew we were going to try and lay it ourselves, and it has a click system to make it easier.
The less fun part for our space is that there are some many nooks and alcoves, which made for a challenging project - plus we wanted to run it seamlessly out into the hall. The click system actually made doing the main body of the floor so easy, for us doable within a few hours, but all the corners and pieces that needed to be cut lengthwise made the whole thing a lot trickier and longer.
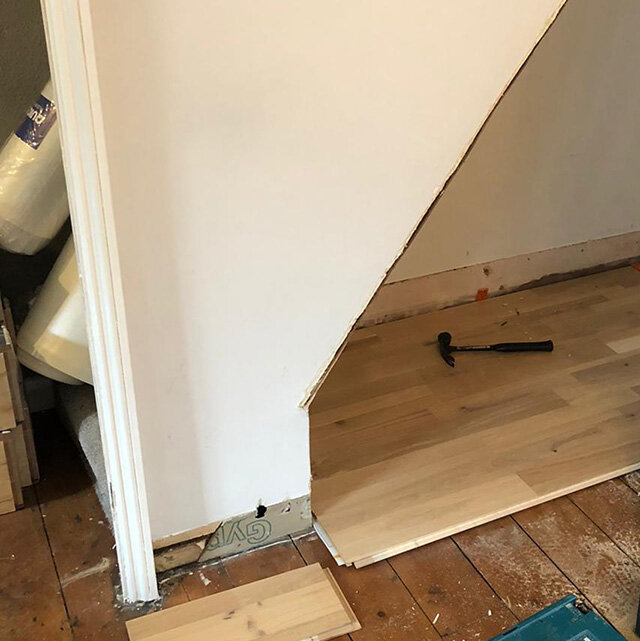
We had to lay the floor under the stairs before we started the built-in storage.
Because we needed to lay on top of an existing floor, we first had to go around and hammer down any boards that felt loose - this also would help to eliminate any squeaks, which we had more than a few of before. We then used the Unisound underlay from Quickstep. It’s an underlay designed for general use and reducing sound, but we also found it levelled out any slight unevenness left on the original floor.
Running the flooring out into the hallway without a threshold bar.
We managed to cut and lay our flooring with just the help of a jigsaw, because we’d be laying new skirting board on top of the edges, it wasn’t super important for the lines to be deadly straight.
So many alcoves and difficult bits to cut around.
The click system was super easy to use, but you’ll still need to invest in a few flooring tool basics to get the job done - a rubber mallet, pull bar and tapping block is what we used to knock the boards firmly into place when they’re connected.
For first-time floorers, I’d say it’s super achievable to use this product, so if you’re umming and ahhing about whether you can handle it, I say go for it!
Want to see the final result?
Let me know what you think about the before and after!


